May
Blog
Growing Curry Leaf Plant in Pots: A Complete Guide for Beginners
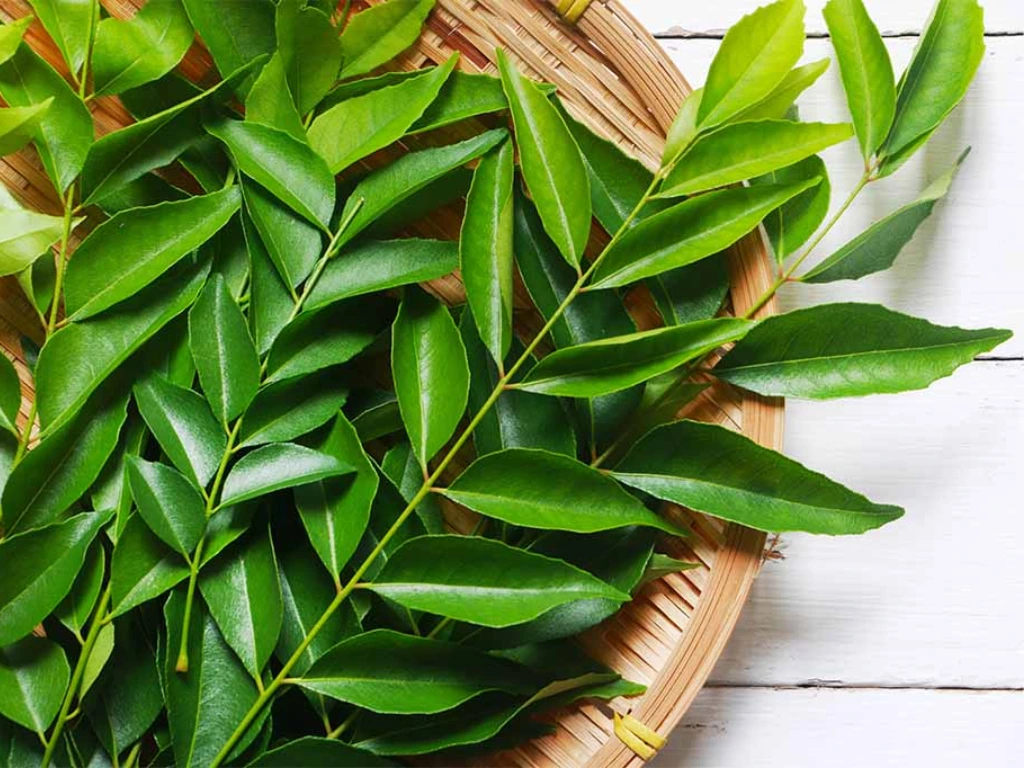
If you’re a fan of authentic South Asian cuisine, you already know that nothing compares to the incredible, nutty aroma of fresh curry leaves.
But if you don’t live in a tropical climate or you’re dealing with limited backyard space, you might think growing your own tree is out of the question. Well, you’ve come to the right place! In this comprehensive guide, I’m going to walk you through everything you need to know about how to grow curry leaf plants in pots, whether it’s for your sunny kitchen windowsill or your patio.
Growing curry leaf plants in pots is a fantastic solution for northern gardeners, apartment dwellers, or anyone looking to have a steady supply of this aromatic herb right at their fingertips. But before we get our hands dirty, let’s first answer the big question.
Read more: Top Reasons to Grow Your Own Curry Leaf Plant at Home
Why Grow Curry Leaf Plants in Pots?
When you think of a curry leaf plant (Murraya koenigii), you might picture a large, bushy tree growing in a tropical garden. While they can grow quite big in the ground, they actually adapt beautifully to container life. So, why should you consider growing it in a pot?
-
Weather Control: Curry leaf plants are native to the tropics and absolutely hate the cold. Growing Curry leaf plants in pots means you can easily bring them indoors when winter rolls around.
-
Size Management: A container naturally restricts the root system, keeping your plant at a manageable, compact size that fits perfectly on a balcony or patio.
-
Perfect Drainage Control: These plants are incredibly sensitive to soggy roots. In a pot, you have total control over the soil environment.
But how do you get started? Let’s dive into the steps!
Preparing for Growing Curry Leaf Plant in Pots
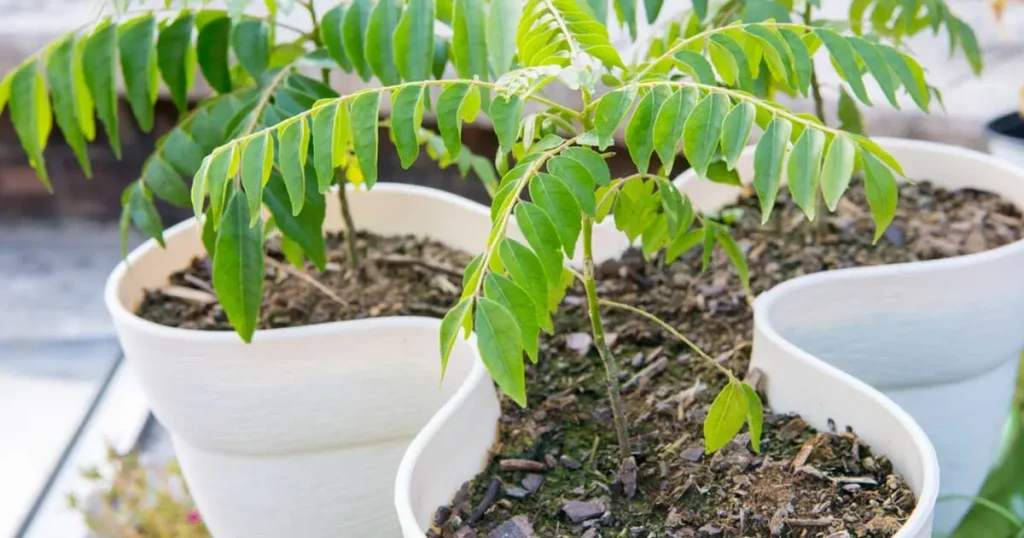
Choosing the Right Container
When it comes to container gardening for this tropical beauty, picking the right pot can make or break your success.
-
Size Matters: Start with a container that is at least 10–12 inches in diameter and depth for a young plant. Curry leaf plants grow a strong taproot, so a deeper pot is always better than a shallow one to prevent it from becoming root-bound too quickly.
-
Drainage is Key: If there is one thing you take away from this guide, let it be this: curry leaf plants despise sitting in water. Ensure your pot has plenty of drainage holes at the bottom.
-
Material Choices: Terracotta or clay pots are absolute champions for curry leaf plants. Because they are porous, they allow excess moisture to evaporate easily, preventing root rot. Plastic pots work too, but you’ll need to be extra careful not to overwater.
Best Soil Mix for Pots
Your curry leaf plant prefers a light, loose, and well-draining soil that mimics its native subtropical environment.
-
Soil Type: Never use heavy garden soil. Instead, opt for a high-quality potting mix and blend in equal parts of perlite or coarse sand to boost drainage. Adding a handful of compost will give it the rich nutrients it craves.
-
pH Level: This plant prefers a slightly acidic soil, ideally with a pH between 6.0 and 6.5.
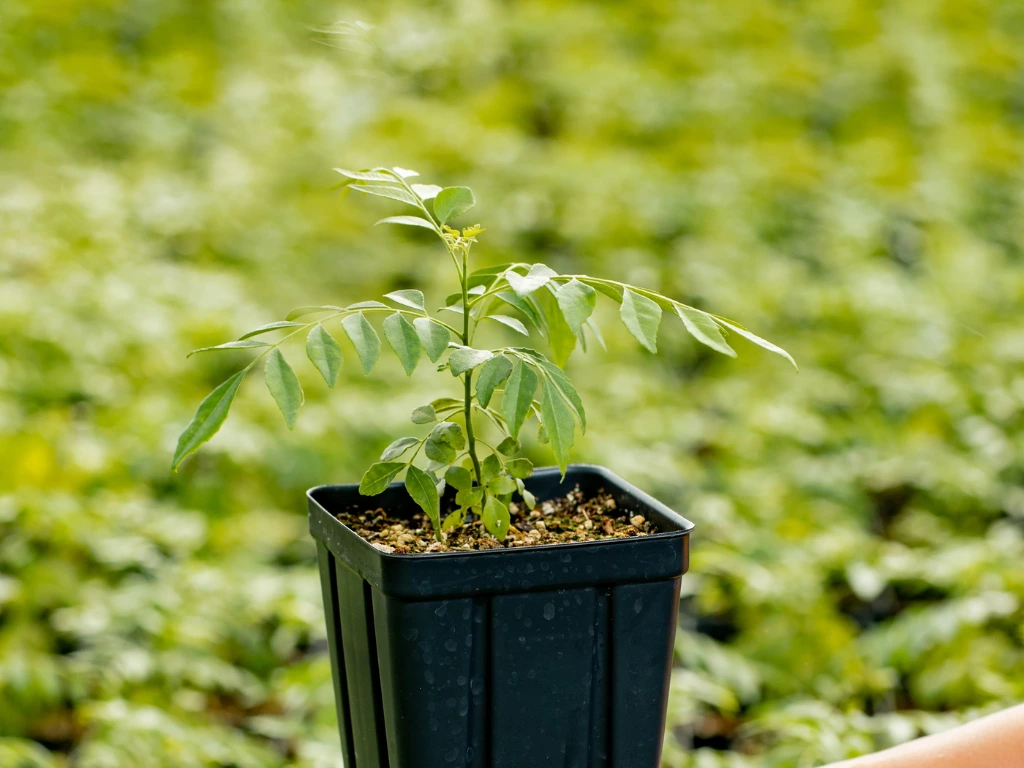
How to Plant Curry Leaf Plants
Now that you’ve got your pot and soil ready, it’s time to get planting! Since growing this plant from seed can be notoriously slow and tricky, I highly recommend starting with a small nursery plant or a healthy cutting.
When to Plant Curry Leaf Plants
The best time to plant or repot your curry leaf plant is in the spring, right as the weather warms up and the plant enters its active growing phase.
Planting Process
-
Fill your container: Add your well-draining soil mix to the pot, leaving about 2 inches of space from the rim.
-
Place the plant: Gently loosen the plant from its nursery container. Be very careful not to disturb the roots too much, as curry leaf plants have sensitive root systems. Place it right in the center.
-
Fill it in: Pack more soil around the root ball, leveling it with the base of the stem. Lightly press down to eliminate air pockets.
-
Water well: Give your new plant a thorough soak until water runs out of the drainage holes, then place it in a shaded spot for a few days to recover from transplant shock.
Read our full guide here: Curry Leaf Plant Care: The Ultimate Guide for Healthy Growth
Caring for Curry Leaf Plant in Pots
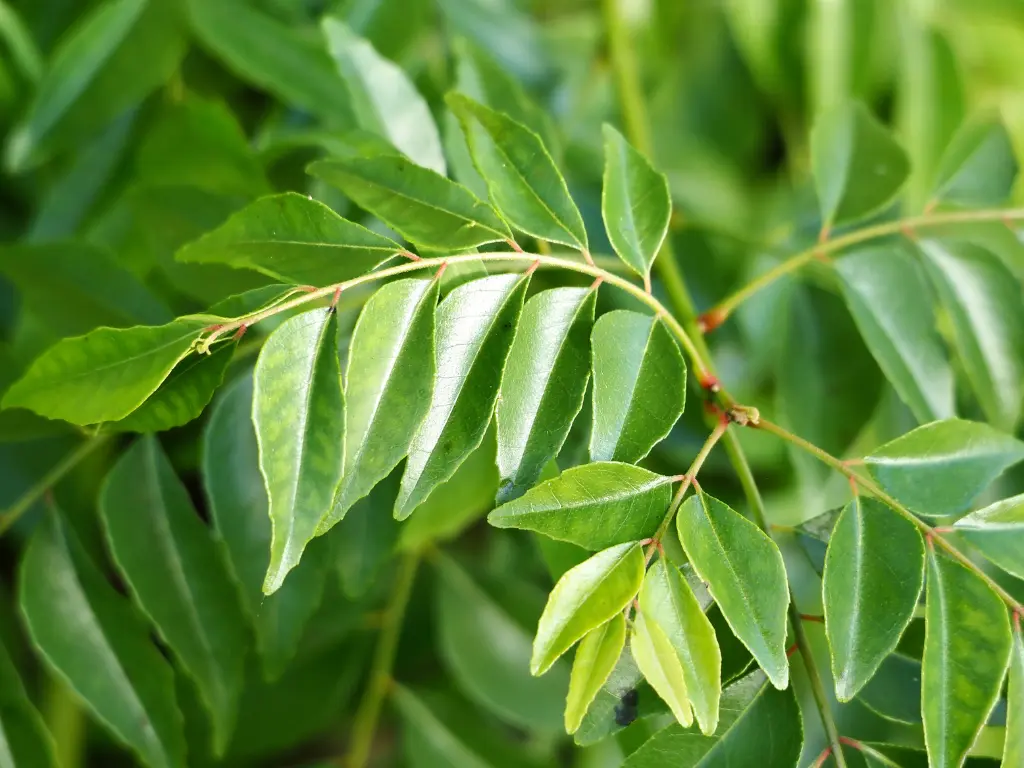
Sunlight and Temperature
Curry leaf plants are absolute sun-worshipers. To truly thrive and develop those essential oils that give the leaves their signature intense aroma, they need at least 6 to 8 hours of direct sunlight daily.
If you are growing it indoors, place it by your sunniest south-facing window. Temperature-wise, keep it above 65°F (18°C). If temperatures drop below 50°F (10°C) in the fall, it’s time to bring your pot inside!
Watering
Watering is where most container gardeners run into trouble, but getting it right is simple once you know the secret. The golden rule is to let the soil dry out between waterings. Curry leaf plants hate “wet feet” (sitting in soggy soil), which quickly leads to root rot.
To test if your plant needs a drink, stick your finger about two inches deep into the potting mix. If it feels completely dry and powdery, it’s time to water. When you water, do it thoroughly—pour water evenly over the soil until it begins to stream freely out of the drainage holes at the bottom of the pot. This ensures the entire root ball gets hydrated. In the scorching summer months, you might find yourself watering every couple of days. However, during the cooler winter months when the plant goes dormant, its metabolism slows down dramatically, and you may only need to water it once every few weeks.
Feeding
Because potted plants lose nutrients every time you water them, giving your curry leaf plant a little nutritional boost is essential to keep its foliage lush and vibrant. However, it isn’t a super heavy feeder, so a gentle hand is best.
During its active growing season (spring through summer), feed your plant once a month with a nitrogen-rich fertilizer to encourage heavy leaf production. Organic options like diluted liquid seaweed, fish emulsion, or blood meal work wonderfully. Another great trick is to apply a tablespoon of decomposed manure or compost to the top layer of the soil every few months. This mimics the rich, organic forest floors of its native habitat. Never fertilize in the late fall or winter when the plant is resting, as this can cause weak, leggy growth that is highly susceptible to pests.
Pruning and Pinching
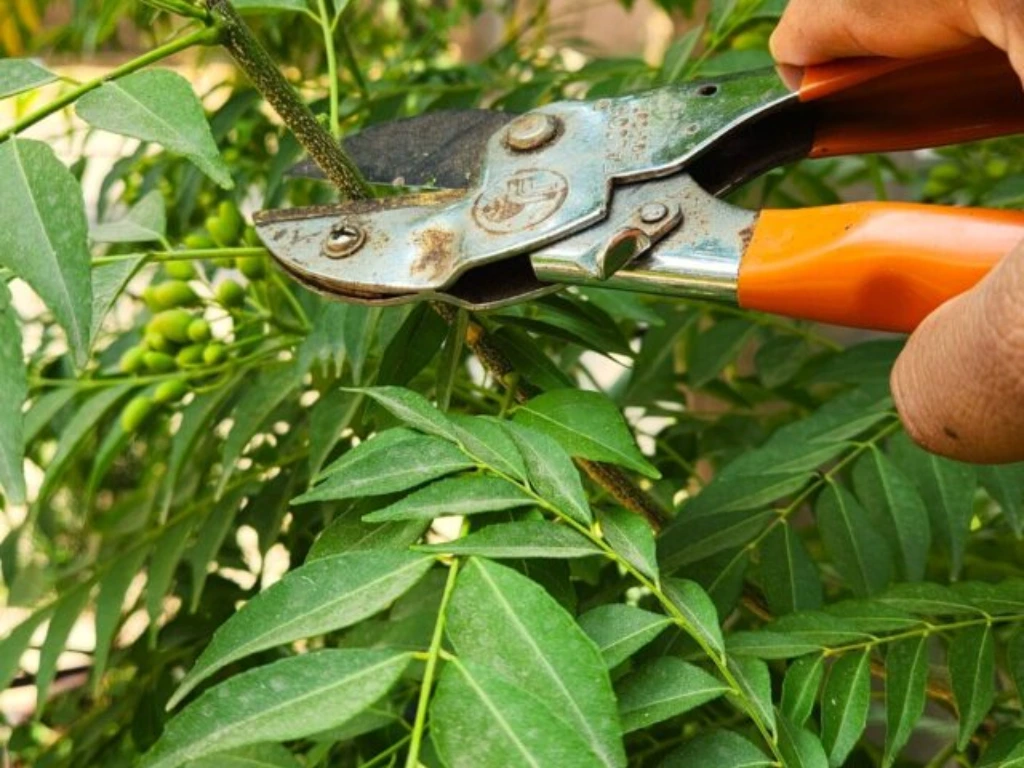
If you leave a curry leaf plant to its own devices in a pot, it has a tendency to grow as a single, tall, leggy stalk with very few leaves. If you want a thick, bushy, leaf-heavy plant instead, pinching is your absolute secret weapon.
-
Pinching Young Plants: When your plant is still young (around 6–12 inches tall), use your fingernails to pinch off the very tip of the main center stem. This breaks the plant’s apical dominance and forces it to branch out into multiple new side stems.
-
Pruning Mature Plants: For older plants, don’t be afraid to give them a hard prune in the early spring. Cut back leggy branches by one-third, making your cuts just above a leaf node. This triggers a massive explosion of fresh, bushy green growth exactly where you want it.
Common Problems and How to Solve Them
Pests
Keep an eye out for aphids, scale insects, or spider mites, which sometimes love to hide under the leaves. You can easily manage these uninvited guests by wiping the leaves with a damp cloth or spraying the plant with an organic neem oil solution.
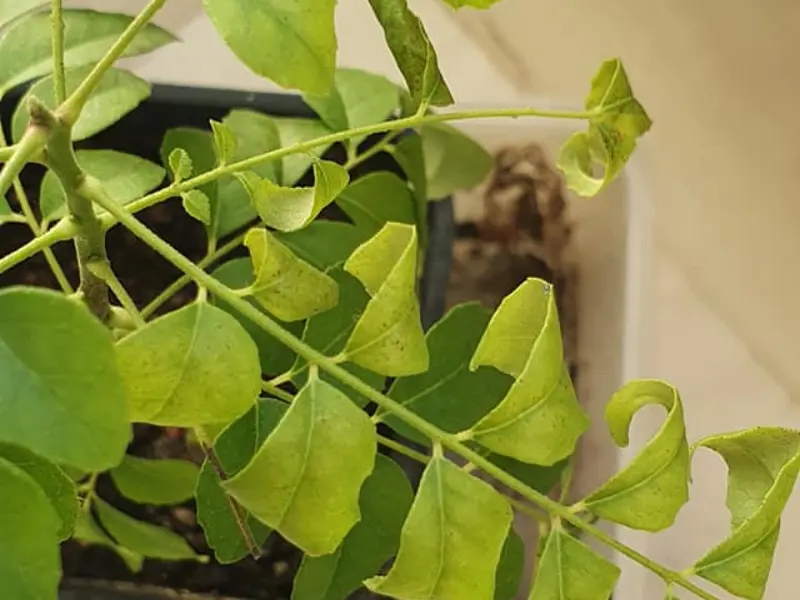
Yellowing or Dropping Leaves
If your plant is dropping leaves like crazy in the winter, don’t panic! This is often a natural sign of winter dormancy. However, if leaves turn yellow in the summer, it’s usually a warning sign of overwatering or a lack of nitrogen. Check your soil moisture!
Slow Growth
Is your plant stuck in slow motion? Curry leaf plants naturally take a break when the weather cools down. If it’s summer and still sluggish, it might just need a bit more direct sunlight or a boost of liquid fertilizer.
You may like to read: 7 Common Curry Leaf Plant Problems: Easy Fixes for a Thriving Plant
Harvesting and Using Curry Leaves
When and How to Harvest
The most important rule of thumb is to always harvest entire leaf sprigs rather than plucking individual little leaflets off the stem.
-
Look closely at the plant—each long stem with rows of small leaflets is actually one single compound leaf. Grab the base of this long leaf petiole where it meets the main branch, and gently snap or snip it off with sharp shears.
-
Always start your harvest from the older, lower parts of the plant and work your way up. Never strip the fresh, tiny new leaves growing at the very top of the stems, as this is the plant’s main growth engine.
-
To keep your potted tree healthy and stress-free, never harvest more than one-third of the plant’s total foliage at any given time. Regular, moderate harvesting actually acts like light pruning, stimulating the plant to branch out and produce even more aromatic leaves for your kitchen!
Culinary Uses in the Kitchen
To unlock their full potential, you need to release their essential oils through a cooking technique called tempering (often called tadka or chhonk):
-
Heat a tablespoon of oil or ghee in a pan over medium-high heat.
-
Once the oil is hot, drop in your fresh curry leaves (make sure they are completely dry after washing, or they will splatter!).
-
You will instantly hear a loud, satisfying crackle, and the kitchen will fill with an unbelievable, nutty aroma.
This infused oil forms the perfect, flavorful foundation for authentic South Indian curries, rich lentil dals, coconut chutneys, and spiced rice dishes. You can even fry them up until crispy and use them as a gorgeous, crunchy garnish over grilled fish, chicken, or roasted vegetables.
How to Store Your Harvest
While using them straight from the plant is always best, you might find yourself with a surplus after a big spring pruning session.
-
To keep them fresh, wash the sprigs, pat them completely dry with a paper towel, strip the leaflets from the stems, and store them in an airtight container lined with a dry paper towel in the fridge. They will stay fresh and flavorful for up to two weeks.
-
If you want to keep them for months, freezing is the ultimate trick. Pop the clean, dry leaflets into a zip-top freezer bag and squeeze out the excess air. They will keep their incredible flavor for up to six months, and you can drop them straight into hot oil right out of the freezer—no thawing required!
Conclusion
Growing curry leaf plants in a pot is an incredibly rewarding journey that brings a taste of the tropics right to your home. By giving it plenty of sunlight, keeping the soil on the drier side, and offering it a cozy spot indoors for the winter, you’ll have a thriving, fragrant companion for years to come.
So, are you ready to add this aromatic superstar to your container garden? Happy gardening, and may your kitchen always smell amazing!
Frequently Asked Questions (FAQs)
Can I grow a curry leaf plant fully indoors?
Yes, but it needs a lot of light. A very sunny windowsill or the help of a T5 grow light will keep it happy indoors year-round.
Why is my curry leaf plant losing all its leaves in winter?
Don’t worry! If it’s winter, the plant is likely just going dormant due to cooler temperatures and shorter days. Reduce watering, and it will bounce back with fresh green growth in the spring.
How often should I repot it?
Generally, every 1 to 2 years. When you see roots starting to peek out of the drainage holes or notice the soil drying out instantly, it’s time to upgrade to a pot that is 2 inches larger.
Why do my homegrown curry leaves lack that intense aroma?
It’s usually due to a lack of direct sunlight or overwatering. Your plant needs 6–8 hours of full sun to produce the essential oils that give the leaves their rich flavor. Keeping the soil too wet also dilutes these flavorful oils.
Can I grow a curry leaf plant from a cutting in a pot?
Absolutely! Cut a 4–6-inch semi-hardwood stem, remove the lower leaves, and dip the end in rooting hormone. Plant it in a moist, well-draining potting mix, keep it warm with indirect light, and roots should develop in a few weeks.
Why is there a black, sooty coating on my plant’s leaves?
This is “sooty mold,” caused by pests like aphids or scale insects that leave behind a sticky residue. Wash off the black coating with a gentle spray of water, then treat the plant with organic neem oil to eliminate the pests.
Will my potted curry leaf plant produce flowers and berries? Should I keep them?
Yes, mature plants will grow fragrant white flowers and dark purple berries. However, unless you want to harvest seeds, it’s best to pinch the flower buds off immediately. This forces the plant to direct all its energy into growing delicious foliage instead.
Growing Carolina Reaper Peppers in Pots: A Complete Guide for Beginners
If you’ve ever wanted to add some serious, record-breaking heat to your home cooking, you’ve [...]
May
Growing Curry Leaf Plant in Pots: A Complete Guide for Beginners
If you’re a fan of authentic South Asian cuisine, you already know that nothing compares [...]
May
5 Tips for Growing Carolina Reaper Peppers to Get the Spiciest Harvest Ever
Holding the record for one of the world’s hottest peppers, the Reaper isn’t just a [...]
May
Best Fertilizers for Zoysia Grass in 2026: Get a Lush Lawn
As we enter the new year, the time has come to think about how we [...]
Apr
Bougainvillea Plant Care Tips: 7 Secrets to Explosive Blooms!
Are you staring at a bougainvillea that is all lush green leaves but hasn’t shown [...]
Apr
5 Tips for Growing Sweet Potatoes to Get the Biggest Sweet Potato Harvest Ever
If you are a fan of sweet potatoes, then these tips for growing sweet potatoes [...]
Apr